
Sad Shayari in Hindi captures the deep emotions of heartbreak, loneliness, and pain. These heartfelt lines express the sorrow of life and relationships, resonating with those who have experienced sadness in love or life.
With a blend of poetic beauty and emotional depth, सैड शायरी हिंदी 2 line girl sad shayari and सैड शायरी अकेलपन evoke feelings of longing and heartache. This sad shayari💔💔 is perfect for expressing yourself on social media or in personal notes.
Here you can read the best सैड शायरी हिंदी 2 line 💔💔. Read the best sad shayari😭 life 2 line instagram.
वह रोज़ मुझे बिछड़ने वालों के किस्से सुनाया करती थी
फिर मालूम हुआ वह मुझे समझाया करती थी💔😔
बहुत मजबूत थे मगर
जी भर के तोड़ा गया हमें 💔 ♥
कैसे कोशिश करूं सोने की ऐ रात 🥹
नींदें बेचकर ही तो यार खरीदा था मैंने 😰
उसके होने से सहूलत थी जीने में
उसके होने से साँसें मयस्सर थीं
कच्ची उम्र के इश्क़ ने अज़ीयतें दी हैं इस कदर…!!!
ऐन जवानी में ही हम बूढ़े लगने लगे…!!
तेरे बगैर मुझे ये जहाँ दरकार नही
तेरे बगैर नहीं कायनात वारे में मुझे
कभी रिश्ते मुसलसल…!!!
कभी फासले मुसलसल…!!!
सुनो, क्या अज़ीयत है…!!!
आप मुझे मुकम्मल मयस्सर क्यों नहीं हो जाते…!!!
मोहब्बत वफादारों के लिए ज़िंदगी भर की दास्तान है…!!
और बेवफ़ाओं के लिए मामूली सा वाक़िया…!!!
अगर बुरा न मानें तो एक बात कहूँ…!!!
हम रफ्ता-रफ्ता तेरे बिन मर रहे हैं…!!!
दिल मुन्तज़िर रहता था जिनका… अब उनसे राब्ते नहीं होते…!!
मेरी रूह में बसा हुआ वो शख्स… मेरे दिल से खेल गया…!!!
खामोश ज़ुबां…!!
उदास दिल…!!
तवील हिज्र…!!
नसीब में एक शख्स की कमी…!!
ऐ ज़िंदगी तेरे तोहफ़ों पर आह करूँ या वाह…!!
फकत कुछ दिनों की ही बात है…!!!
हम आपको फिर कहीं भी मयस्सर नहीं होंगे…!!!
क़ुव्वत-ए-बर्दाश्त देखने के लिए…💔
हम फिर से किसी हसीना को चाहेंगे…💔
वह जिन दिनों तू मुझसे ग़ुरेज़ां था बे-सबब
मुझको तेरी शदीद ज़रूरत थी उन दिनों 🙂
कभी-कभी यूँ भी होता है ज़िंदगी में,
हर ख़ुशी रूठ जाती है तन्हाई में
मुस्कुराना तो आता है हमें भी मगर,
क्या करें, दिल नहीं मानता रुसवाई में
ए कमबख्त दिल ❤ कुछ तो रहम कर
तू याद भी उसे करता है जो बर्बाद कर गया 💔
बहुत याद करता होगा मुझे वह अब तक
मेरे दिल से यह वहम क्यों नहीं जाता❣❣
Short and powerful, 2 Line Sad Shayari in Hindi is perfect for conveying deep emotions in just a few words. Sad shayari😭 life boy.
Lines like “जीनदग जो रोने वाली शायरी” or “Sad Shayari rula dene wali” carry the weight of heartbreak and longing, making them ideal for statuses, captions, and personal reflection. Sad shayari😭 life girl 2 line.
लिख कर चला गया वो चेहरे पे अपना ग़म
मुझको अता अजीब निशानी वो कर गया
ग़म-ए-हयात की वीरानियों में चुपके से
तुम्हारी याद क्यों आती है, रोक लो इसको
रस्म-ए-उल्फ़त ये इजाज़त नहीं देती, वरना
हम भी ऐसा तुम्हें भूलें कि क्या याद करो 🖤
अजीब तरह के शिद्दत पसंद हैं हम भी
खुशी-खुशी में कई ग़म भी पाल रखे हैं 🖤
तेरा चेहरा भी न याद आए कि तू कैसा है
मैं तुझे सोच के रह जाऊँ यहाँ तक सोचूँ
अफ़सानों की दुनिया में सब झूठ नहीं होता
दिल और भी उलझेगा, पढ़िए न किताबों को
मुझ सी अना परस्त ने चाहा उसे
पत्थर को अपनी आँच से पानी वो कर गया
मेरी ज़ात के जंगल में आग फैली है 🍂
बुझा न पाओ तो जलने का हौसला रखना 🍂
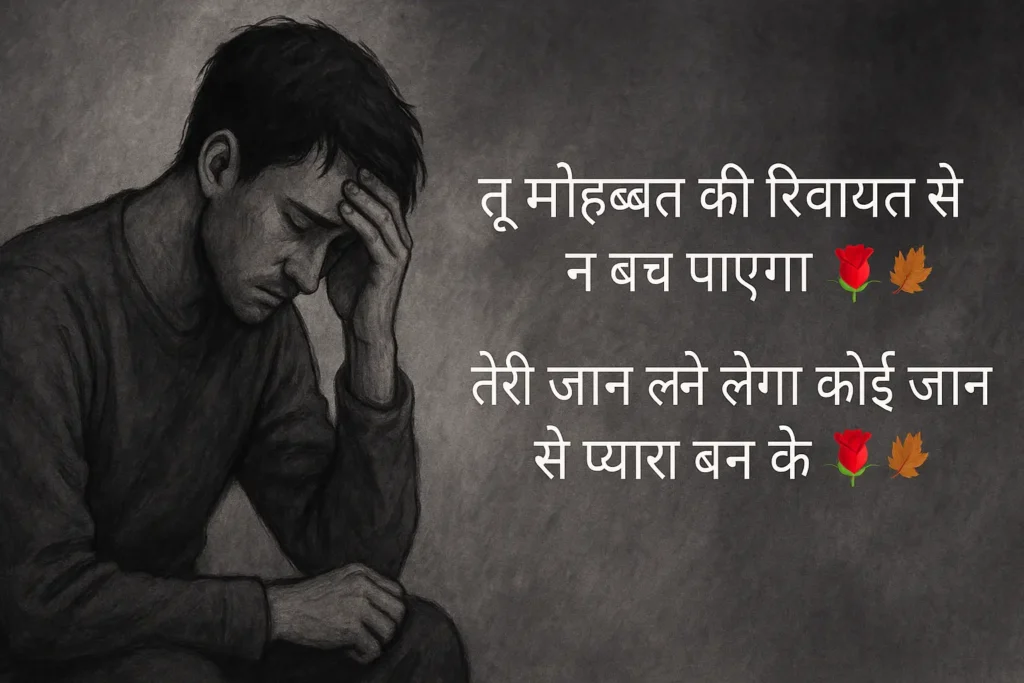
तू मोहब्बत की रिवायत से न बच पाएगा 🌹🍂
तेरी जान ले लेगा कोई जान से प्यारा बन के 🌹🍂
न चाहत के अंदाज़ अलग न दिल के थे जज़्बात अलग
थी सारी बात लकीरों की, तेरे हाथ अलग मेरे हाथ अलग
हमने तो वक्त से भी शिकायत छोड़ दी,
जब अपना ही बदल गया, तो गैरों से क्या उम्मीद की
दिल की हर बात छुपा ली हमने,
क्योंकि दर्द अब सुनने वाला कोई नहीं
Life can often feel overwhelming, and sad shayari😭 life 2 line beautifully captures these moments. From expressing the silence of a broken heart to reflecting on the unpredictability of kismat, this sad shayari in hindi on life provides solace to those going through tough times.
सैड शायरी जो रुला दे and emotional sad status connect deeply with the struggles of life and help one embrace their feelings.
टूट जाता है गरीबी में वो रिश्ता जो खास होता है
हजारों यार बनते हैं जब पैसा पास होता है
और फिर ऐसा हुआ जब मुझे ज़रूरत पड़ी…!!
इत्तेफाक से हर शख्स मशगूल हो गया…!!
मैं बहुत जोर से हंसा, बड़ी मुद्दतों के बाद ❤🔥
आज फिर किसी ने कहा, मेरा ऐतबार कीजिए 💔
ज़िंदगी एक अंजान किताब जैसी है। ❤🩹
अगले पन्ने पर क्या लिखा है, किसी को नहीं पता। 🍂🥀
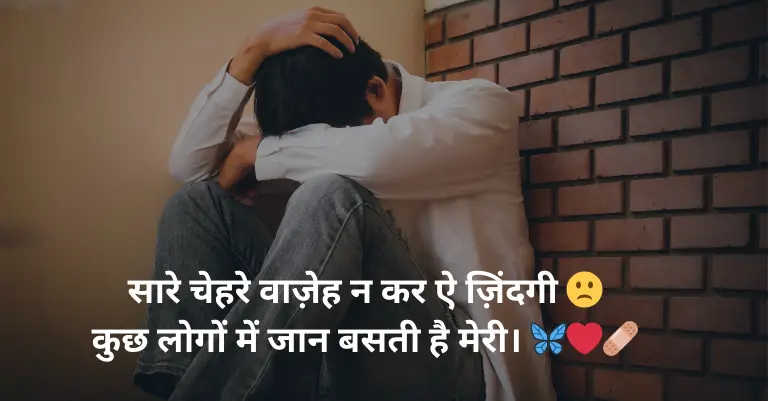
सारे चेहरे वाज़ेह न कर ऐ ज़िंदगी 🙁
कुछ लोगों में जान बसती है मेरी। 🦋❤🩹
एक वाक़े के बाद न जाने मुझे क्या हुआ
फिर मैंने लोगों पर ऐतबार करना छोड़ दिया। 🤍🌙
आप अपनी ज़िंदगी से भले खुश न हों
पर कुछ लोग ऐसे भी हैं, जो आपकी जैसी ज़िंदगी जीने के लिए तरसते हैं
हम जैसे आम से चेहरों से कौन पूछता है
यहां अदाओं की कीमत है, सादगी की नहीं
आपके पास तो चाहतों की भीड़ है__❤🩹🍁
हमारा क्या बनेगा, हमारे पास तो सिर्फ आप थे_💔👀
तुम्हें लगता होगा कि तुम्हें याद नहीं करते
हम वो सांस ही नहीं लेते जिसमें शामिल तुम्हारी याद न हो
Heartbreak is one of the most profound human experiences, and Broken Heart 2 line Sad Shayari resonates with this pain.
Whether it’s for lost love, जुदाई, or apno ke liye, these shayaris bring comfort to aching hearts. These lines, written with raw emotions, help you process feelings of betrayal, loneliness, and longing.
उसने कुछ साँसें बाकी छोड़कर…
हमारे दर्द की उम्रें दराज़ कर दीं…
खामोशियाँ राज करती हैं मुझमें…
उदासियों का खूबसूरत ज़ज़ीरा हूँ मैं.
तुम कहाँ तक करोगे मेरी दिलजोई…?
मैं तो अक्सर उदास रहता हूँ
सबक़ था ज़िंदगी का…
मुझे लगा मोहब्बत है
लिख देने से… या कह देने से…
अज़ीयतें कहाँ खत्म हो जाती हैं
हम जैसे लोग…
मरे हुए दिल के साथ जीए जा रहे हैं
शिद्दत-ए-इश्क़ के बावजूद…
तअल्लुक़ अब सिर्फ़ चुप का है
कर मोहब्बत भी मगर पहले ज़रा सीख तो ले
कैसे दिल टूट कर जुड़ता है, बहल जाता है
नहीं है शिकवा मुझे किसी की बेरुख़ी पर…
शायद हम ही न थे दिलों में बसने के काबिल।💔😟
चलो बिखरने देते हैं ज़िंदगी को…❤🩹
संभालने की भी एक हद होती है।🌼
Sad statuses in Hindi are a way to share your emotional state with the world. Perfect for WhatsApp, Instagram, or Facebook, these lines include short yet impactful expressions like सैड शायरी कुपी and सैड शायरी छोटी सी.
These captions not only reflect your mood but also resonate with those who feel the same.
तेरी गफलतों को ख़बर कहाँ…🖤
मेरी उदासियाँ हैं उरूज पर।🖤
उम्र राइगां कर दी तब ये बात मानी है
मौत और मोहब्बत की एक ही कहानी है
बिना मतलब के दिलासे भी नहीं मिलते।
लोग दिल में भी दिमाग़ लिए फिरते हैं।💔🙂
वक्त की रवानी बदल देती है ज़िंदगी के सभी रंग
कोई चाह कर खुद के लिए उदासियाँ नहीं खरीदता
अपने मुताबिक ढालकर मुझको
मेरी रस्सियाँ छोड़ दीं उसने
एक ख़लिश सी है दिल में कि कुछ मालूम तो हो
बिछड़ के मुझसे वो किस हाल में रहता होगा।🌸
हज़ार टुकड़ों में बटकर भी उसका अक्स रही
मैं आइना थी, बिखरने पे एतमाद भी था
होंठ प्यासे रहे, हौसले थक गए, उम्र सहरा हुई
हमने पानी के धोखे में फिर रेत पर कश्तियाँ डाल दीं
कहेगा झूठ वो मुझसे कि तुम्हारी याद आती है
कोई है मुन्तज़िर कितना, ये लहजे बोल देते हैं
जिसके होने से मेरी साँस चला करती थी
किस तरह उसके बगैर अपना गुज़ारा होगा
ज़िंदगी अब के मेरा नाम न शामिल करना
गर ये तय है कि यही खेल दुबारा होगा
अच्छे हैं या बुरे हैं, खुद अपने लिए हैं। 🌸🌷
हम खुद को नहीं देखते औरों की नज़र से। 🌸🌷
For those who want to blend sadness with a dash of attitude, Sad Shayari attitude boy and सैड शायरी एट्टीट्यूड are the perfect fit.
These lines express pain while also reflecting strength and resilience. Whether it’s dealing with betrayal or showing the world you can rise above heartbreak, these shayaris make a bold statement.
दिल मुखलिस है तेरी मोहब्बत में वरना!!
लोग और भी मयस्सर हैं दिल लगाने को
मैं जानता हूं कि दुनिया तुझे बदल देगी…
मैं मानता हूं कि ऐसा ज़ाहिर नहीं है तो…
मेरी जान, हंसी-खुशी से बिछड़ जा अगर बिछड़ना है तो…
यह हर मोड़ पर क्या सोचता है आखिर तू…
आपको इश्क़ करना है___तो जनाब कीजिए।
बस एक___मेरी ज़ात से परहेज़ कीजिए।
बड़ी मुश्किल से___मैंने खुद को संभाला है।
अरे जाइए जनाब, मेरी आदतें मत खराब कीजिए ❤🩹🥀♥🖤✨
अदब, लिहाज़, और मुरव्वत ने मुझे चुप करा रखा है…!! ❤
अरे जाओ…!! 🙌🏻
सिर मत खाओ…!!
मैंने सबको आज़मा रखा है…!! 💔❤🔥🔥✰✰🙃
मुन्तज़िर मेरे ज़वाल के हैं ✨
मेरे अपने भी क्या कमाल के हैं 💫🌏
लगा कर आग इस दिल को चले हो तुम कहां साहिब 💔💔
अभी तो राख उठने पर तमाशा और भी होगा 💔
अना-परस्त तो हम भी ग़ज़ब के हैं 🖤✨
बस तेरे ग़ुरूर का थोड़ा एहतराम करते हैं 🔥
Sad Shayari captions are ideal for Instagram, expressing feelings like mood off or the anguish of lost love. Read Sad shayari captions for instagram.
Whether you choose a line in Hindi like “अकेलेपन की शायरी” or an English caption like “Heart Touching Sad Shayari,” Life sad Quotes, these short quotes amplify the emotional depth of your posts.
आँखों का रंग, बात का लहजा बदल गया
वो शख्स एक शाम में कैसा बदल गया
मैंने इंसान की वफ़ा पर यकीन करना छोड़ दिया है
जब क़िस्मत बदल सकती है, तो ये मिट्टी के इंसान क्यों नहीं
वही तो था जो मेरे मसले समझता था
उसे गंवा दिया मैंने, ये क्या किया मैंने🖤
मौसम-ए-हिज्र में बारिश का बरसना कैसा? 🥀
एक सहरा से समंदर का गुजरना कैसा? 🥀
ए मेरे दिल, न परेशान हो तन्हा होकर। 🥀
वो तेरे साथ चला कब था, बिछड़ना कैसा?
लफ़्ज़ों का हेर-फेर है, ज़रा संभल के रहना तुम। ❣️🌹🍂
मोहब्बत लफ़्ज़ है लेकिन ये अक्सर हो भी जाती है। ❣️🌹
यूँ तो हम लोग मोहब्बत से ग़ुज़ारिश ही रहे। 🍂🥀
दिल ने चाहा था तेरा साथ, मगर क्या कीजिए। 🍂🥀
मुझे आज भी याद है वो शाम
जब मुकर गया था कोई अपनी ज़ुबान से
उतरा था लम्हा भर को कोई दुख शऊर में
बोले, चले, न रोए, पर आसाब थक गए
New Sad Shayari keeps up with the ever changing emotions of life. From सैड शायरी नेपाली to modern interpretations of heartbreak, these lines resonate with today’s audience.
They combine traditional depth with contemporary flair, making them relatable and impactful.
तुमसे नफ़रत बहुत ज़रूरी थी
ये न करते तो प्यार हो जाता
नींदें गिरवी हैं उसके पास🥀
मोहब्बत उधार ली थी जिससे
तूने कैसा ये रिश्ता रखा
न मिले हो न फासला रखा। ❤️🌹
इससे पहले कि रुत बदल जाए🌹🥀
अपने सारे गुलाब ले जाना 💔❤️
You can use this as Instagram post shayari and share with friends.
मेरी वहशतों को बढ़ा दिया है जुदाइयों के अज़ाब ने❣️
मेरे दिल पे हाथ रखो ज़रा, मेरी धड़कनों को करार दो
लफ़्ज़ कहने वालों का कुछ नहीं जाता❣️
लफ़्ज़ सहने वाले कमाल करते हैं❣️
हमें पता है तुम कहीं और के मुसाफ़िर हो💔
हमारा शहर तो यूंही रास्ते में आया था💔
लाज़मी नहीं कि जिस पर हमें मान हो बहुत
वो शख्स सारी ज़िंदगी वफ़ादार भी रहे
Alone Sad Shayari reflects the solitude of a broken soul. Whether it’s for an alone boy or a lonely girl, these Hindi shayaris express the pain of being left behind.
Lines about खामोशी and missing loved ones touch hearts and evoke a sense of belonging in shared sadness.
तो मैं भी खुश हूँ कोई जा के उसको कह देना🥀💔
अगर वो खुश है मुझे बेकरार करते हुए 🥀💔
आ गया जिस रोज़ अपने दिल को समझाना मुझे🥀
आपकी ये बेरुखी किस काम की रह जाएगी?
उससे कहना तुम्हारी याद में बेहद अज़ीयत है💔🍂
या अपना नक्श धो जाए या मेरा फिर से हो जाए💔
बहुत भीड़ है न तुम्हारे दिल में
चलो साहब, हम निकल ही जाते हैं
बिछड़े हैं और लोग, एक तुम भी सही💔🥀
अब इतनी बात पे क्या ज़िंदगी हराम करें💔
चुपके-चुपके दे जाते हैं
गहरे रोग, सुनहरे लोग💔
बहुत तड़पाया है इस दिल को तेरी यादों ने,
हर रोज़ कोई नया ज़ख्म दिया इन बातों ने
अब तो ख्वाबों में भी आने से डर लगता है,
कहीं फिर से न रूला दे तेरी यादों की रातों ने
Sad Shayari quotes in Hindi & English capture emotions universally. From “Sad Shayari dp for girl” to quotes on life and love, these lines are perfect for social media.
Whether written in English or हिंदी, these quotes speak to the soul and provide comfort in times of sorrow.
इस दुनिया की हमदर्दी में भी धोखे हैं 🔥❤
मेरे अच्छे वक़्त ने लोगों को बताया कि मैं कैसा हूं 💐
और मेरे बुरे वक़्त ने मुझे बताया कि लोग कैसे हैं 💔
चार दिन किसी की भरपूर तवज्जो पाकर हवाओं में उड़ने से परहेज़ करें
क्योंकि वही शख्स आपको अगले चार दिन में ज़मीन पर भी पटक सकता है 💔🙂💯
इसी जुदाई सबसे ज़्यादा तकलीफ़देह है 😫💔
जिसमें इंसान कुछ कहे बिना छोड़ जाए 🥺🥀
कभी-कभी खो भी जाना चाहिए, यह देखने के लिए कि कौन तलाश करने आता है 💔🥀🖤
हीरों को परखना हो तो अंधेरे का इंतजार करें
धूप में तो कांच के टुकड़े भी चमक उठते हैं 👈💔💯
मोहब्बत के आदी लोग लहजों की सख़्ती बर्दाश्त नहीं कर सकते 🥹🌸
मैंने बहुत अहमियत देकर देखी है मगर मैं खास नहीं बन पाया किसी के लिए 🙂🌸❤🩹
किसी अना-परस्त के लिए इससे ज़्यादा अज़ीयत की बात क्या हो सकती है कि उसे किसी लापरवाह से मोहब्बत हो जाए 💔
लोग भी अच्छे होते हैं जब हालात अच्छे होते हैं 🙂
कभी-कभी इंसान पर ऐसा वक़्त भी आता है कि वह अपने आप को तसल्ली देने की ताकत भी खो चुका होता है ❤🩹
दिखावे के अपनेपन से हकीकत की दूरियां बेहतर हैं ❤🩹🙂
मोहब्बत या इज़्ज़त किसी को इतनी मत दो
कि वह तुम्हारी कद्र करना भूल जाए 🌿💔🔥
🥺 जिनसे मोहब्बत की जाती है ना 🙂
उनकी इज्जत मोहब्बत से ज्यादा की जाती है 💯💯
इससे तेरी मोहब्बत का तब एहसास होगा जब तू किसी और के पास होगा